Introduction
If you’re diving into the world of machine embroidery, one file format stands out above the rest: the PES file. This format is essential for Brother embroidery machines, ensuring your digital designs stitch out exactly as intended. Whether you’re converting logos, drawings, or digital artwork, having a reliable Brother PES file converter is the key to a smooth embroidery process.
In the fast-paced world of crafting and apparel, time is of the essence. That’s why using a fast, accurate, and easy-to-use PES converter can be a game-changer. For those looking for professional-quality results without the stress, Digitizing Buddy offers expert embroidery digitizing services tailored for Brother machines. They’ll take your image and convert it into a precise PES file, so you can start stitching with confidence.
What Is a PES File?
PES stands for “Program Embroidery Stitch”, and it’s a proprietary format used by Brother and Baby Lock embroidery machines. This file type contains stitch data, thread color information, and machine instructions. Essentially, it tells your machine how to embroider your design—down to the very last stitch.
Without the correct PES file, even the most beautiful artwork can’t be translated into embroidery.
Why You Need a PES File Converter
Not every design comes in a ready-to-stitch format. Most images are in:
- JPEG, PNG, BMP – standard image files
- PDF, AI, EPS – vector artwork files
- SVG – scalable design files
- DST, EXP, JEF – other machine formats
To use these with a Brother machine, you need to convert them to PES format. A PES file converter takes your image or artwork and transforms it into a file that your machine can read and stitch.
Benefits of Using a High-Quality PES Converter
Time-Saving
No need to spend hours tweaking files manually. A good converter streamlines the process and delivers results fast.
Machine Compatibility
Brother machines require precise formatting. Using a verified PES converter ensures full compatibility, avoiding misreads or machine errors.
High Stitch Accuracy
Accurate conversions reduce thread breaks, stitching errors, and misaligned designs. The result? Professional-looking embroidery every time.
Manual vs. Automated Conversion – What’s the Difference?
You’ll find both automatic converters and manual digitizing services online. Here’s the difference:
| Type | Pros | Cons |
| Automatic | Fast, often free | Poor stitch quality, no fabric considerations |
| Manual (like Digitizing Buddy) | Precision, tailored stitch paths, better end result | May take a few hours |
If you need your design to look perfect on a final product, manual digitizing always wins.
Use Cases for PES Conversion
Not sure when you’ll need a PES file? Here are some common situations:
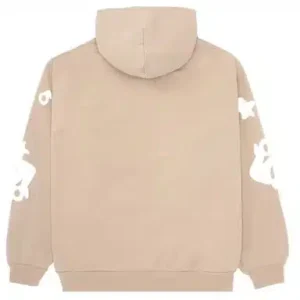
- Logo embroidery for hats, shirts, and uniforms
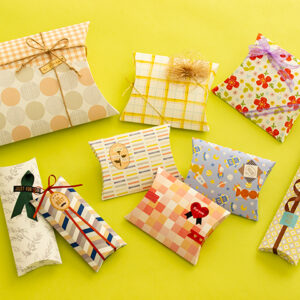
- Custom gifts like towels, blankets, and aprons
- Craft projects including patches and monograms
- Business branding on merch and promotional items
From hobbyists to professional embroiderers, converting designs to PES is part of the journey.
How to Convert an Image to a PES File
Here’s a simple step-by-step overview:
- Choose your image – Use a clear, high-resolution design.
- Send it to a digitizer – Preferably one experienced with Brother machines.
- Receive your PES file – Download and transfer it to your embroidery machine.
- Test stitch it – Always run a sample on similar fabric before bulk stitching.
Services like Digitizing Buddy do all the technical work for you, ensuring perfect stitch maps and thread paths.
What Makes a PES File Stitch-Ready?
A stitch-ready PES file includes:
- Optimized stitch direction for clean fill and outlines
- Proper underlay stitching for stability
- Adjusted density based on fabric type
- Defined thread colors and stop points
- Minimal trims and jumps for smooth machine operation
If any of these elements are missing, your design could fall apart during stitching—or worse, damage your fabric.
Why Choose Digitizing Buddy for PES Conversion?
Digitizing Buddy is a professional embroidery digitizing service with expertise in converting all kinds of artwork into machine-ready PES files. Here’s what sets them apart:
- Accuracy-focused digitizing
- Works with all design types – logos, hand drawings, text, etc.
- Fast turnaround times – often within 12–24 hours
- Free minor edits & format changes
- Affordable pricing without cutting quality
When you need top-notch results for your Brother machine, you can count on Digitizing Buddy to deliver.
Tips for Better PES Conversion Results
- Use vector files (like SVG or AI) for the cleanest input
- Avoid low-res or pixelated images—they’re harder to digitize cleanly
- Let your digitizer know the fabric type and design size
- Request trim points and color stops for easy multi-thread designs
- Always test run before production
These small steps make a big difference in how your final embroidery looks and performs.
Converting Between File Formats
Already have a different embroidery format like DST, EXP, or JEF? No problem—PES file converters can help you cross-convert formats too.
Many embroidery shops use multiple machines, so format flexibility is key. Digitizing Buddy offers free conversions to multiple formats once the design is digitized—great for multi-machine setups.
Final Thoughts: Stitch Smart with the Right PES Converter
Embroidery isn’t just about stitching—it’s about precision, planning, and presentation. Using the right Brother PES file converter ensures that every project turns out exactly as you imagined. Whether you’re adding a logo to work uniforms or creating custom merch, starting with a perfectly digitized PES file sets you up for success.